Check the Baby Unit Mounting Location
Before mounting your baby unit, check that you have selected the best location for mounting. If you have already selected the best location, skip to Mount the Baby Unit below.
Planning to install your baby unit in a designated location? Use the parent unit to test which of the selected monitoring location within the house have good signal strength.
- Make sure your video monitor is connected to your baby unit and find the following status icons displayed on the parent unit:
Strong Signal
 : When the signal strength icon bars are full, it indicates the signal is strong and the video will stream smoothly.
Weak Signal
 : When you see these icons, it indicates the signal is weak.
Interrupted/No Signal
 : When you see red icon bars, it indicates the signal has been interrupted. The baby unit may be too far away from the parent unit, or some internal walls are blocking the signal. Find a suitable monitoring location where the baby unit and parent unit are close to each other. Change the location until the signal strength status icon is full. Then, you are ready to mount the baby unit.
Mount the Baby Unit
Notes
• Check for reception strength and baby unit’s angle before drilling the holes.
• The types of screws and anchors you need depend on the composition of the wall. You may need to purchase the screws and anchors separately to mount your baby units.
1. Place the wall mount bracket on a wall and then use a pencil to mark the top and the bottom holes as
shown. Remove the wall mount bracket and drill two holes in the wall (7/32 inch drill bit).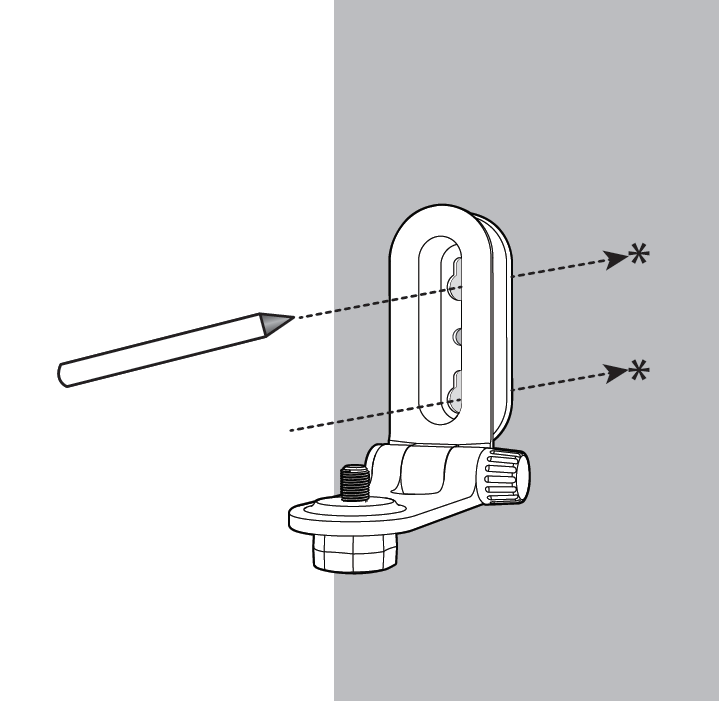
2. If you drill the holes into a stud, go to step 3.
• If you drill the holes into an object other than a stud, insert the wall anchors into the holes. Tap gently on the ends with a hammer until the wall anchors are flush with the wall.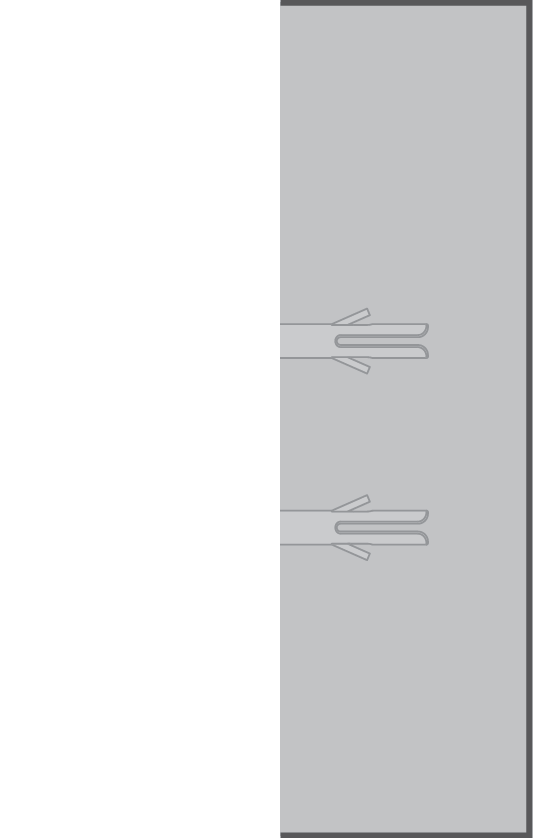
Option 1: Install the wall mount bracket onto the wall first
3. Align the wall mount bracket and screws with the holes in the wall as shown. Tighten the screw in the
middle hole first, so that the wall mount bracket position is fixed. You can tighten the other screw in
the top hole.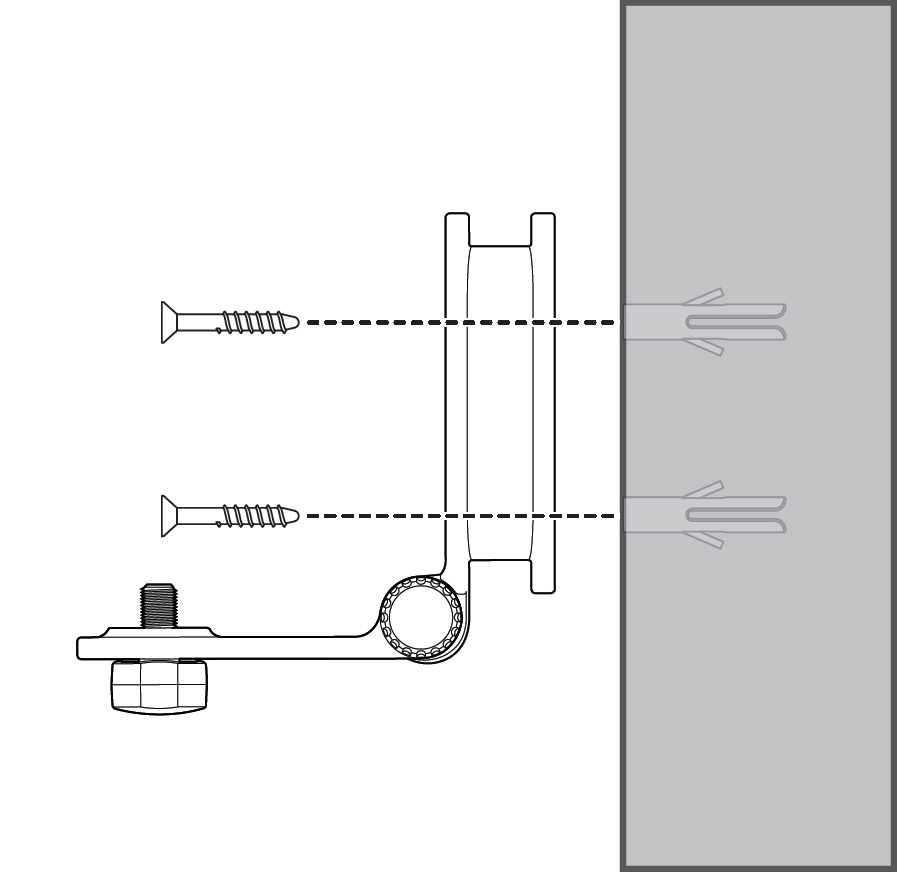
4. Place the baby unit on the wall mount bracket. Tighten the screw into the threaded socket at the
bottom to secure the baby unit.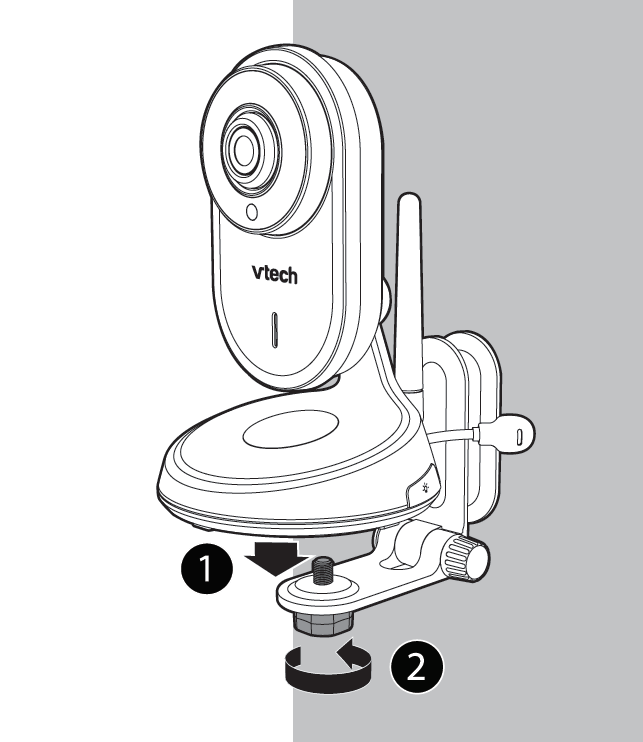
Option 2: Attach the baby unit and wall mount bracket first
3. Insert the screws into the holes and tighten the screws until only 1/4 inch of the screws are exposed.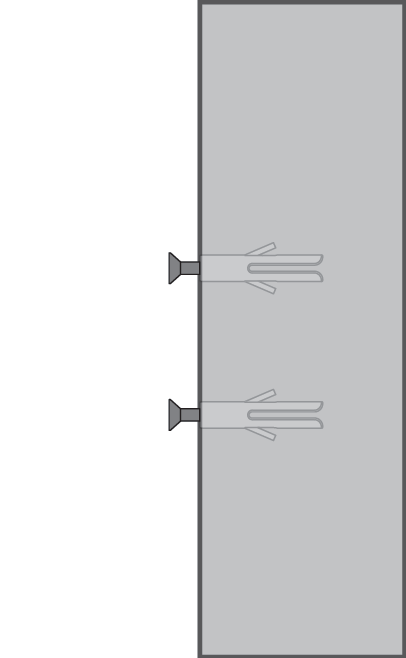
4. Place the baby unit on the wall mount bracket. Tighten the screw into the threaded socket at the bottom to secure the baby unit. Align the holes on the wall mount bracket with the screws on the wall, and slide the wall mount bracket down until it locks into place.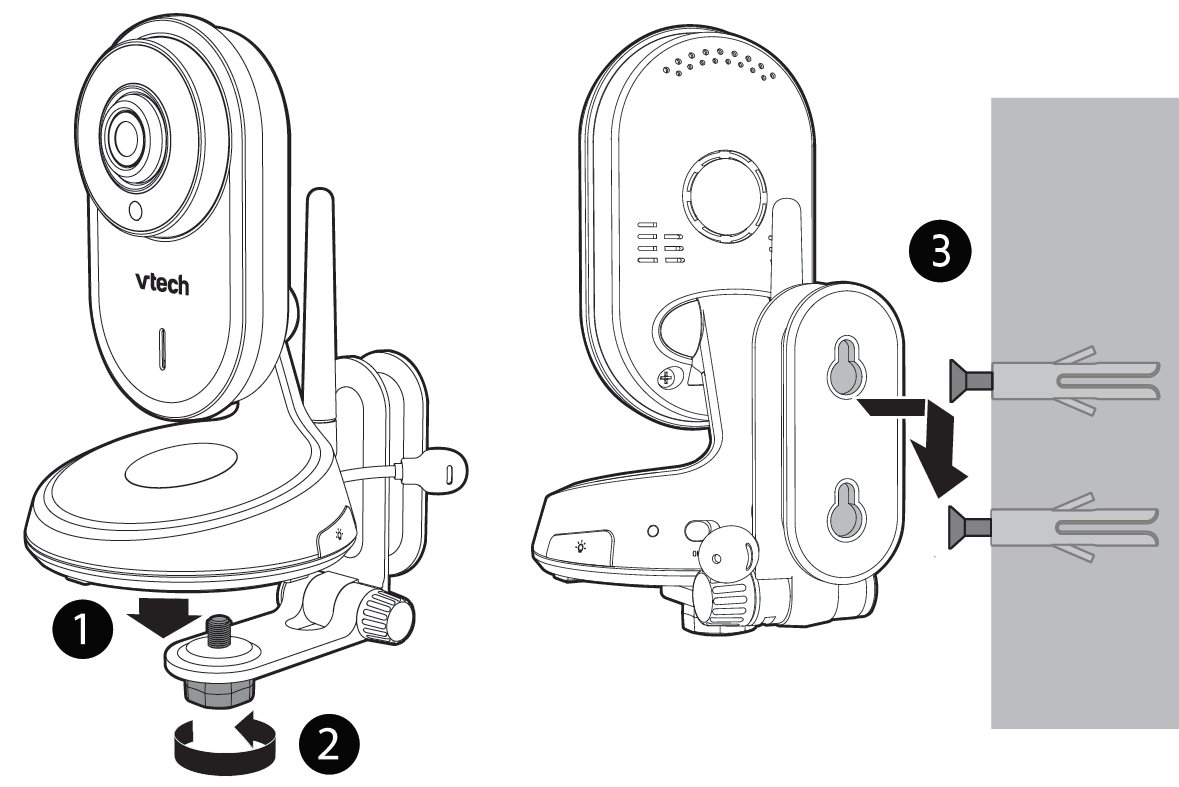
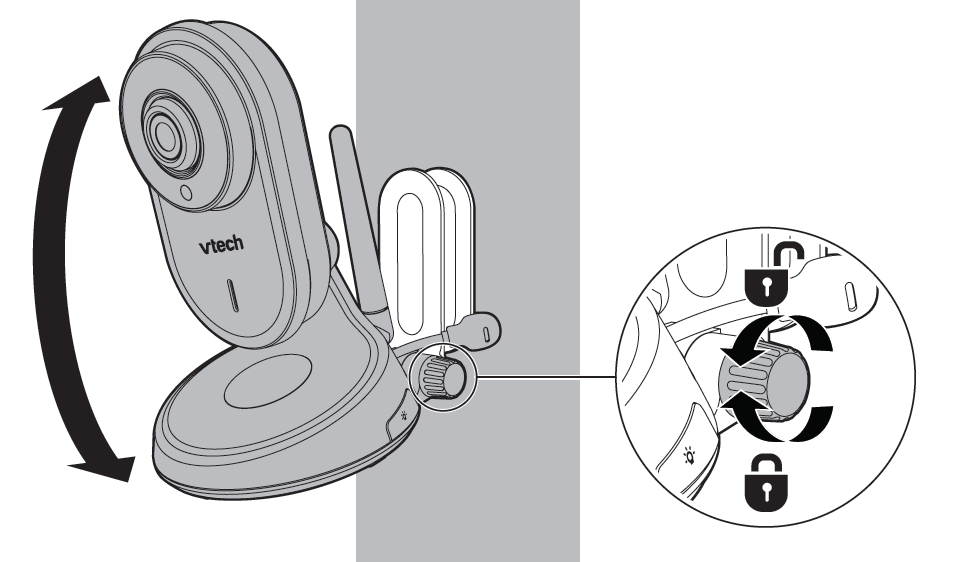
5. You can maximize your baby unit’s viewing angles by tilting the wall mount bracket. Hold the baby unit, and then rotate the knob in an anti-clockwise direction. This will loosen the joint of the wall mount bracket. Tilt your baby unit up or down to adjust to your preferred angle. Then, rotate the knob in clockwise direction to tighten the joint and secure the angle.